hexo+github
1、下载工具
下载node.js
**安装教程:**https://blog.csdn.net/qq_48485223/article/details/122709354
**验证:**cmd 输入:node -v
下载git
**安装教程:**https://blog.csdn.net/mukes/article/details/115693833
验证: 随机文件夹下shift+右键 打开git bash输入:git version
安装hexo
**安装教程:**cmd输入:cnpm install -g hexo-cli (nodejs安装里有cnpm模块下载方法)
**验证:**hexo -v
2、配置github(开仓库)
- 创建github账号
- 创建public类型仓库:仓库名必须是
你的用户名.github.io - 配置ssh免密登录
- ssh登录是非对称加密,产生密钥对(public key 和 private key),在git中产生命名为id_rsa.pub,id_rsa
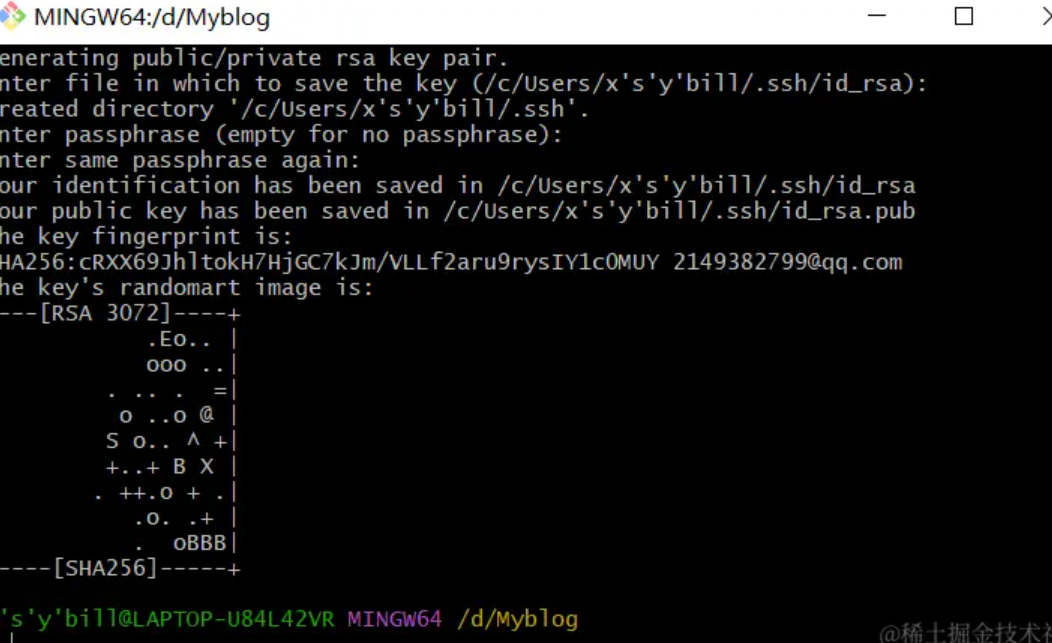
- 打开git bash输入(自行安装ssh):ssh-keygen -t rsa -C github邮件地址,一路回车
- 成功页面

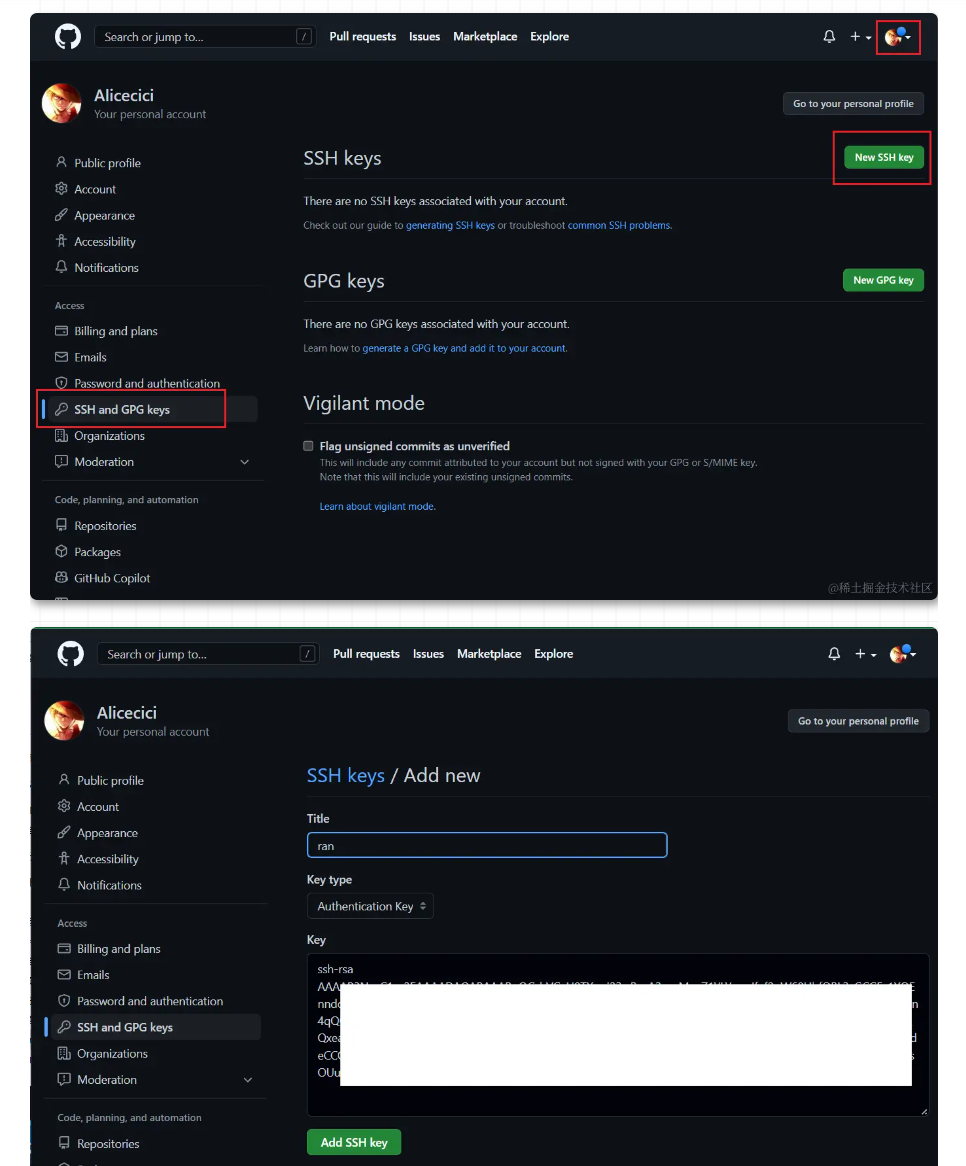
- 这时候可以看到图中的ida_rsa.pub所在路径,找到打开复制里面的全部内容。粘贴到github的SSH keys中。

- 验证 git bash中输入:ssh -T git@github.com 注意:要输入yes
hexo搭建博客
本地初始化博客
新建文件夹Blog
进入文件夹,打开git bash,输入:hexo init 初始化,就会生成一系列文件
输入命令: hexo s; 在本地启博客
修改生成文件中的_config.yml
1
2
3
4
5
6
7
8
第一种:
deploy:
type: git
repository: https://github.com/Alicecici/Alicecici.github.io.git //填你自己仓库的地址
branch: main1
2
3
4
5
6第二种
deploy:
type: git
repository: git@github.com:NasYangh/NasYangh.github.io.git
branch: main3.上传到github仓库
- Blog文件夹下 git bash输入:npm install hexo-deployer-git –save
- hexo g //生成页面
- hexo d //上传
- 然后访问用户名.github.io(自己一开始填的)
切换主题(butterfly)
- 在当前文件夹下git bash 输入:git clone github主题链接:https://github.com/jerryc127/hexo-theme-butterfly
- 把他移动到Blog文件夹下的themes文件夹下面
- 修改_config.yml 中的themes 为主题文件夹名

4.访问网页如果报错:extends includes/layout.pug block content include ./includes/mixins/post…
- 依次输入:
- npm install hexo-renderer-pug hexo-renderer-stylus –save
- npm install hexo-deployer-git –save
注意:
- 每次修改完后记得删除缓存,重新上传
- hexo cl;hexo g;hexo d;
本博客所有文章除特别声明外,均采用 CC BY-NC-SA 4.0 许可协议。转载请注明来自 Nas's Blog!
